Step into almost any kitchen, and your eyes are naturally drawn to the heart of the home – the floor. While sparkling tiles often catch the initial gaze, it’s the often-overlooked network of grout lines that can dramatically dictate the entire aesthetic. Far too often, these once pristine pathways succumb to an unsightly accumulation of grime, grease, and discoloration, transforming a vibrant culinary space into something decidedly less inviting. This pervasive issue isn’t merely a cosmetic concern; dirty grout can harbor bacteria and detract significantly from your home’s overall cleanliness and value, casting a shadow over even the most meticulously arranged décor.
Yet, a common misconception persists: that achieving truly clean grout requires back-breaking labor, harsh chemicals, or the costly intervention of professional services. We’re here to persuasively challenge that notion. Armed with the right knowledge, a few readily available tools, and a dash of strategic thinking, you can remarkably restore your kitchen’s tiled surfaces to their original, sparkling glory. This isn’t just about cleaning; it’s about reclaiming the beauty and hygiene of your kitchen, empowering you to tackle even the most stubborn stains with confidence and remarkable effectiveness. Prepare to be astonished by the transformation awaiting your floors.
Essential Grout Cleaning Arsenal & Methods
Before diving into the step-by-step process, it’s crucial to understand the most effective tools and techniques at your disposal. This table provides a quick reference to the powerful allies in your quest for pristine grout, offering diverse approaches for different levels of grime.
The Science Behind the Grime: Why Grout Gets So Dirty
To truly conquer dirty grout, understanding its vulnerabilities is paramount. Grout, typically a cement-based material, is inherently porous. This characteristic, while allowing for slight flexibility and accommodating tile expansion, also makes it behave like a tiny, absorbent sponge. Each spill of coffee, drip of sauce, splash of cooking oil, or even the everyday accumulation of dust and foot traffic, is readily absorbed and trapped within its microscopic crevices. Over time, these particles become deeply embedded, creating that unsightly, darkened appearance that resists casual mopping. Furthermore, the constant exposure to moisture in kitchen environments often fosters the growth of mildew and bacteria, adding another layer to the cleaning challenge.
Your Step-by-Step Guide to Grout Grandeur
Embrace this practical, expert-backed methodology to reveal the hidden brilliance of your kitchen’s grout. By meticulously following these steps, you’ll witness a transformation that brings renewed life and vigor to your entire kitchen space.
- Preparation is Key: Begin by thoroughly sweeping or vacuuming the tiled area. This crucial first step removes loose dirt and debris, preventing it from turning into muddy streaks during the cleaning process. Ensuring a clear surface significantly enhances the effectiveness of subsequent cleaning agents.
- Choose Your Weapon Wisely: Referencing our comprehensive table above, select the cleaning method best suited for your grout’s condition. For general discoloration, the baking soda and vinegar paste is a remarkably gentle yet powerful starting point. For tougher stains or mildew, hydrogen peroxide or an oxygenated cleaner might prove more effective.
- Application and Penetration: Apply your chosen cleaner directly onto the grout lines. If using a paste, spread it generously. For liquid solutions, a spray bottle ensures even distribution. Allow the cleaning agent ample time to work its magic – typically 5-15 minutes. This dwell time is critical, allowing the solution to break down and lift embedded grime effectively.
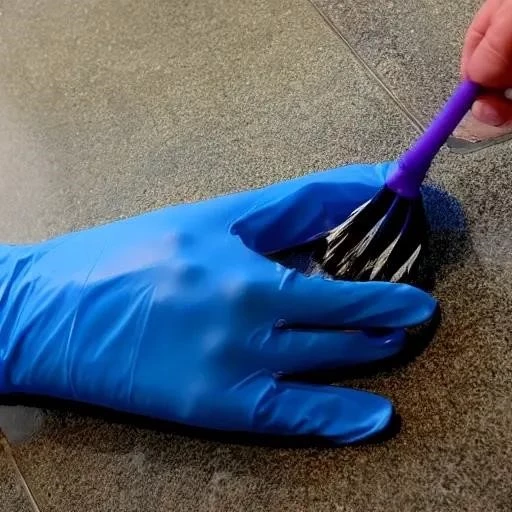
- The Power of the Scrub: Armed with a dedicated grout brush (or an old toothbrush for tighter spots), vigorously scrub the treated lines. Focus on small sections, applying firm, circular motions. You’ll visibly observe the dirt loosening and lifting from the grout. This physical agitation is indispensable for dislodging deeply entrenched particles.
- Rinse and Reveal: After scrubbing a section, wipe away the dirty residue with a damp microfiber cloth, frequently rinsing the cloth in clean water. Alternatively, a mop can be used for larger areas, ensuring you change the water often to avoid redepositing grime. Repeat this process until all cleaning solution and loosened dirt are completely removed.
- Post-Cleaning Polish: Once dry, step back and admire your handiwork. For an extra layer of protection and shine, consider applying a grout sealer; This transparent barrier dramatically reduces the grout’s porosity, making future cleaning significantly easier and extending its pristine appearance.
Expert Insights and Preventative Measures
Leading home care specialists often emphasize that prevention is, without question, the most powerful tool in maintaining immaculate grout. Regularly cleaning up spills immediately, using floor mats in high-traffic areas, and performing routine light cleaning with a mild, pH-neutral cleaner can dramatically reduce the frequency of deep cleaning sessions. “Sealing your grout every 1-2 years is a game-changer,” advises Maria Rodriguez, a seasoned residential cleaning expert. “It’s like adding an invisible shield, drastically prolonging the life and appearance of your kitchen floors.” This simple, proactive step is incredibly effective in warding off future discoloration and making your maintenance routine remarkably simpler.
When to Call in the Professionals
While these DIY methods are incredibly effective for most situations, there are instances where professional intervention becomes a wise investment. If your grout is severely stained beyond the point of DIY recovery, if there’s significant mold growth, or if you’re considering regrouting entirely, a professional service can offer specialized tools and expertise. They possess industrial-grade equipment, such as powerful steam cleaners and high-pressure washing systems, capable of tackling decades of accumulated grime, restoring your grout to a condition you might have thought impossible;
Transform Your Kitchen, One Grout Line at a Time
The journey to a gleaming kitchen floor is not an insurmountable challenge, but rather a rewarding project within your grasp. By integrating insights from cleaning experts and adopting these practical, powerful techniques, you’re not just scrubbing away dirt; you’re actively restoring the vibrancy and hygienic integrity of your home. Imagine stepping into a kitchen where every tile, every grout line, radiates a newfound cleanliness – a space that truly feels refreshed and inviting. This transformation is more than superficial; it profoundly impacts the overall ambiance and perceived value of your most cherished culinary sanctuary.
Embrace these astonishing grout cleaning secrets, and prepare to be genuinely amazed by the dazzling results. Your kitchen, once shadowed by discolored lines, is poised to emerge as a beacon of pristine beauty, offering a brighter, cleaner future for your home and family. The power to revitalize your space lies quite literally at your fingertips.